We’ve all been there – rushing out the door with messy hair and desperately needing a quick fix that looks effortlessly chic. The ponytail remains our go-to solution for those hectic mornings when we need to look polished in minutes. But let’s be honest – the basic ponytail can feel boring and repetitive.
What if we told you that transforming your everyday ponytail into a stunning hairstyle doesn’t require professional skills or hours of preparation? From sleek low ponytails perfect for the office to textured high ponytails that scream weekend vibes, we’ve discovered countless ways to elevate this classic style.
Whether you’re dealing with second-day hair, preparing for a workout, or simply want to add some flair to your look, these easy ponytail variations will become your new favorites. We’ll show you how to create salon-worthy styles using items you already have at home – no expensive tools or complicated techniques required.
Classic Low Ponytail
The classic low ponytail sits at the nape of your neck and offers unmatched versatility for any occasion. We love how this timeless style works equally well for professional meetings and weekend brunches.
Sleek and Straight Version
Sleek low ponytails create an instantly polished appearance that’s perfect for the office or formal events. Start by applying heat protectant spray to damp hair, then blow dry your strands completely smooth using a paddle brush.
Straighten any remaining waves with a flat iron, working in small sections from roots to ends. Brush all hair back toward the nape of your neck, ensuring there are no bumps or flyaways along the scalp. Secure with a clear elastic band positioned just above your collar line.
Apply a small amount of smoothing serum to your palms and gently smooth over the ponytail length. Wrap a thin section of hair around the elastic to hide it, securing the end with a bobby pin underneath the ponytail base.
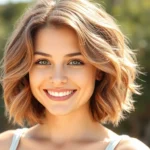
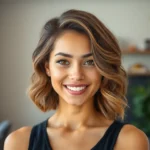
Textured and Tousled Style
Textured low ponytails bring effortless movement and volume to this classic look. Begin with day old hair or add texture spray to clean, dry strands for better grip and hold.
Scrunch your hair gently while applying sea salt spray from mid length to ends. Create loose waves using a curling wand, wrapping random sections in different directions for natural looking texture. Let the curls cool completely before touching them.
Gather your textured hair loosely at the nape, allowing some shorter pieces to frame your face naturally. Secure with an elastic that matches your hair color, leaving the ponytail slightly loose rather than tight against your scalp.
Gently tug at the crown area to create subtle volume, and pull out a few face framing pieces for a relaxed, undone finish.
High Ponytail with Volume
 1")
High ponytails create an instantly elevated look that works beautifully for both casual outings and formal events. We’ll show you two proven methods to achieve impressive height and fullness without professional styling skills.
Teasing Technique for Height
Teasing transforms any basic high ponytail into a show stopping style with dramatic lift at the roots. We start by separating a section of hair at the top of our head, roughly 2-3 inches wide from our hairline to the crown area.
Gentle backcombing creates the foundation for lasting volume. We take our comb and carefully backcomb from the midshaft toward the roots using short, upward strokes. This technique adds texture and support that holds throughout the day.
Surface smoothing conceals the teased section while maintaining height. We brush only the top layer of hair over the teased area, leaving the volume underneath intact. Then we gather all hair at the crown level and secure with an elastic band for an instantly lifted appearance.
Strategic placement of the elastic determines the final height of our ponytail. We position it higher on the head than a standard ponytail, typically at the crown or slightly above ear level, to maximize the dramatic effect.
Using Hair Extensions for Fullness
Hair extensions provide immediate thickness and length for those seeking extra glamour. We secure our initial high ponytail first, then clip in extensions directly above the elastic band for seamless blending with our natural hair.
Clip in extensions offer the most versatility for ponytail styling. We choose extensions that match our hair color and texture, typically requiring 2-4 wefts depending on desired fullness. These temporary additions remove easily after wear without damaging our natural hair.
Proper blending techniques ensure a natural looking finish. We gently tease the extension hair with our natural ponytail, then smooth the surface with a brush to eliminate any visible lines or gaps between the pieces.
Strategic layering creates depth and movement in our enhanced ponytail. We position longer extensions closer to the nape and shorter pieces toward the crown, mimicking natural hair growth patterns for the most realistic appearance.
Side-Swept Ponytail
 2")
A side-swept ponytail transforms your basic style into an asymmetrical masterpiece that flatters virtually every face shape. This elegant variation adds instant sophistication while maintaining the ease we love about ponytails.
Deep Side Part Styling
Creating a dramatic deep side part serves as the foundation for this chic ponytail style. We recommend using a rat tail comb to establish a precise part that extends from your forehead straight back to your crown. Position the part about two inches from your natural center line to achieve maximum impact.
Sweep all your hair to one side following the direction of your deep part. The key lies in maintaining smooth tension as you gather the strands to prevent any bumps or uneven sections. Secure your ponytail with a clear elastic band positioned slightly off center to complement the asymmetrical styling.
For added polish, we suggest wrapping a small section of hair around the elastic to conceal it completely. This professional finishing touch elevates the entire look from casual to refined in seconds.
Incorporating Face-Framing Layers
Face-framing layers work beautifully with side-swept ponytails by creating movement and softening harsh angles around your jawline. These shorter pieces naturally fall forward when you sweep your hair to one side, creating an effortlessly romantic effect.
Leave the front layers loose rather than pulling them tightly into the ponytail base. This technique allows the layers to cascade gently around your face while the remaining hair stays securely fastened. We find this approach particularly flattering for square or angular face shapes.
Apply a light hold hairspray to set the layers in their natural position without creating stiffness. Focus the product on the mid lengths and ends rather than the roots to maintain volume and prevent the layers from falling flat throughout the day.
Braided Ponytail Combinations
 3")
Braided ponytail combinations offer the perfect balance of sophistication and ease for any occasion. We’ll explore two stunning variations that transform basic ponytails into eye-catching masterpieces.
Side Braid into Ponytail
Creating a side braid into ponytail starts with sectioning hair from the crown to the ear on one side. We begin by braiding this separated section using a traditional three-strand technique, securing it temporarily with a small clip.
Repeating this process on the opposite side ensures symmetrical balance throughout the style. The remaining hair gets gathered into a low ponytail at the nape of the neck, creating a clean foundation for the braided elements.
Both braids join at the back, where we secure them just above or alongside the ponytail elastic. This technique creates visual interest while maintaining the sleek appearance of a classic ponytail. The side braids frame the face beautifully and add texture without overwhelming the overall look.
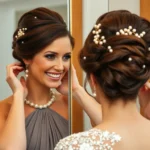
Dutch Braid Crown with Ponytail
Dutch braiding from the crown creates a stunning focal point that elevates any ponytail style. We start this inside-out braiding technique at the hairline, working backward toward the crown area for maximum impact.
Securing the Dutch braid with a small elastic band prevents it from unraveling while we complete the rest of the style. The remaining hair forms a ponytail positioned directly below the braided crown section, creating a cascading effect.
Tucking stray hairs under the braid gives the finished look a polished, salon-quality appearance. This combination works exceptionally well for formal events where we want to showcase intricate braiding skills while maintaining ponytail practicality.
The Dutch braid crown technique adds height and dimension to flat hair, making it perfect for those seeking volume at the crown. Strategic placement of bobby pins ensures the braid stays secure throughout the day without causing discomfort.
Bubble Ponytail
 4")
This playful style transforms the traditional ponytail into an eye-catching statement piece that’s perfect for festivals, parties, or whenever you want to add some fun to your look. We’ll show you how to master this trendy technique that creates dimensional “bubbles” throughout your ponytail.
Creating Multiple Sections
Start by gathering your hair into a high or mid-level ponytail and securing it with a clear elastic band. Space additional elastic bands about 2-3 inches apart down the length of your ponytail, creating distinct sections that will become your bubbles.
Gently tug at each section between the elastics to create volume and the signature bubble effect. Pull the hair outward from all sides of each section to achieve maximum fullness and dimension.
Work systematically from the top bubble down to the bottom, ensuring each section maintains its rounded shape. The key is to create uniform bubbles that are roughly the same size for the most polished appearance.
Use a hair serum on each section to smooth flyaways and add shine to your bubbles. This extra step helps define each bubble while keeping the overall style looking neat and intentional.
Adding Hair Accessories
Wrap thin ribbon around each elastic band to hide the hair ties and add a pop of color to your bubble ponytail. Choose ribbons that complement your outfit or go bold with contrasting shades for a more dramatic effect.
Thread small hair clips or decorative pins between the bubbles to catch the light and create additional visual interest. Pearl pins, rhinestone clips, or metallic accents work particularly well for formal occasions.
Consider using different colored elastic bands instead of clear ones to make each bubble section distinct. This technique works especially well for festival looks or creative photo shoots where you want maximum impact.
Apply a light mist of glitter spray to each bubble for special events or parties. The sparkle catches the light beautifully and transforms your bubble ponytail into a true showstopper that photographs wonderfully.
Twisted Ponytail Styles
 5")
Twisted ponytails add instant sophistication to your look without requiring advanced hairstyling skills. We’ll show you how to master these elegant variations that transform ordinary ponytails into polished statement pieces.
Simple Rope Twist Technique
Rope twists create a refined texture that elevates any basic ponytail into something special. We start by gathering all hair into a secure ponytail at your desired height. Divide the ponytail into two equal sections, then twist each section away from your face in opposite directions. Once both sections are tightly twisted, wrap them around each other in the opposite direction to create the rope effect. Secure the end with a clear elastic band to maintain the twisted structure.
This technique works best on hair that’s at least shoulder length and holds particularly well on day-old hair with natural oils for grip. We recommend misting your hair lightly with texturizing spray before starting to help the twists maintain their shape throughout the day. The rope twist ponytail offers a sophisticated alternative that’s perfect for both professional settings and evening events.
Multiple Twist Variations
Multiple twist combinations allow you to customize your ponytail based on the occasion and your personal style preferences. We love the double low twist, which involves dividing your hair into two sections at ear level, twisting each section separately, then gathering both twisted sections into a low ponytail. This creates beautiful dimension while keeping the overall look polished and office appropriate.
Messy twist ponytails offer a more relaxed approach where we intentionally loosen the twists after securing them. Gently tug at sections of the twist to create volume and texture, resulting in an effortlessly chic appearance that’s ideal for weekend activities. High twist ponytails start with a high base ponytail and incorporate the rope twist technique for maximum drama and height.
We can enhance any twisted ponytail variation with strategic accessories like decorative bobby pins placed along the twist or silk ribbons woven through the rope sections. These small details transform simple twisted ponytails into statement hairstyles suitable for special occasions while maintaining the easy execution that makes them perfect for everyday wear.
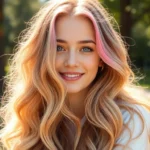
Curly Ponytail Options
 6")
We celebrate the natural beauty of curls with these stunning ponytail variations that showcase texture and movement. Curly hair ponytails offer endless styling possibilities that range from effortlessly casual to elegantly refined.
Improving Natural Curls
Apply curl defining products to damp hair before styling to maximize your natural texture without weighing down your curls. Mousse works particularly well for fine curly hair, while cream based products suit thicker curl patterns. Minimize brushing once your curls have dried to prevent frizz and maintain the integrity of your curl pattern. Finger combing or using a wide tooth comb on wet hair preserves curl definition better than traditional brushes.
Air drying becomes your best friend when creating curly ponytails since it preserves your natural curl patterns without disrupting the texture. Scrunch your curls gently while drying to encourage formation and bounce. Gather curls loosely into your desired ponytail position, whether high, low, or side swept, allowing the natural movement to cascade beautifully. Secure with a silk scrunchie instead of regular elastic bands to prevent breakage and maintain curl health while styling.
Using Curling Tools for Texture
Curling irons and wands transform straight or wavy hair into gorgeous textured ponytails when used on damp hair with heat protectant. Choose barrel sizes based on your desired curl tightness: 1 inch barrels create tighter spirals, while 1.5 inch barrels produce loose waves. Curling rods offer the most defined and long lasting results for creating dramatic texture before gathering hair into ponytails. Leave rods in for 20 30 minutes after styling for maximum curl retention.
Diffuser attachments on hair dryers enhance existing waves and curls by distributing heat evenly without flattening your texture. Use low heat settings and scrunch hair upward while diffusing to encourage curl formation. Hot rollers provide vintage inspired texture that works beautifully for formal curly ponytail styles, creating smooth curls with lasting hold. Finish with lightweight hairspray to lock in your curled texture without creating stiffness or crunch in your finished ponytail style.
Messy Bun Ponytail
 7")
We’re bringing you the perfect solution for those days when you want effortless elegance with minimal time investment. This relaxed styling approach creates beautiful texture while maintaining sophisticated appeal for any occasion.
Half-Up Ponytail Style
Dividing your hair into strategic sections forms the foundation of this versatile look. Start by parting your hair horizontally from ear to ear, creating distinct top and bottom portions that’ll give you complete control over the final style.
Gathering the upper section requires gentle tension to avoid unwanted bumps. Use your fingers to collect hair from the crown area down to your imaginary horizontal line, ensuring smooth collection that maintains natural volume at the roots.
Securing this top portion with a quality elastic creates your base ponytail. Position the hair tie approximately 2 inches above your ears for optimal placement that flatters most face shapes and provides excellent styling versatility.
Applying light hold hairspray keeps flyaways under control without creating stiffness. Mist the gathered section before and after securing to maintain that polished yet relaxed appearance we’re aiming for throughout the day.
Leaving the bottom section loose adds casual sophistication to your overall look. This flowing hair creates beautiful movement and provides the perfect contrast to your secured upper portion.
Securing Loose Pieces
Using bobby pins strategically eliminates stubborn flyaways that resist your initial styling efforts. Select pins that match your natural hair color exactly, creating seamless integration that maintains the illusion of effortless perfection.
Targeting exact problem areas requires a methodical approach for lasting results. Focus on the hairline around your temples and the nape area where shorter pieces typically escape your ponytail’s hold.
Applying hairspray with a light touch preserves your style’s natural movement. Hold the bottle 8 to 10 inches away from your head and use quick, even sprays rather than concentrated applications that can create unwanted stiffness.
Choosing hair ties that complement your natural color creates professional looking results. Clear elastics work universally well, while colored options should match your hair shade exactly to maintain that seamless, polished appearance we’re creating.
Ponytail with Hair Wraps
 8")
Hair wraps transform basic ponytails into polished styles that look professionally crafted. We’ll explore two effective wrapping techniques that add instant sophistication to your everyday look.
Using Your Own Hair as Wrap
Wrapping strands of your own hair around the ponytail base creates a seamless, expensive-looking finish. Start by securing your hair into your preferred ponytail position with a regular elastic band.
Take a small section of hair from underneath the ponytail, approximately 1/2 inch wide. Wrap this strand tightly around the elastic band, covering it completely in 2-3 rotations. The wrapped section should lay flat against your head without any gaps showing through.
Secure the wrapped strand by tucking the end underneath the base and fastening it with a bobby pin that matches your hair color. Pull the bobby pin tight against your scalp to ensure the wrapped hair stays in place throughout the day.
Gently tug at the ponytail to create slight volume and texture while keeping the wrapped base smooth and polished. This technique works exceptionally well with straight or slightly wavy hair textures.
Incorporating Ribbons and Scarves
Ribbons add playful color and texture to ponytails while creating versatile styling options for different occasions. Choose ribbons that complement your outfit or create contrast for a bold statement look.
Wrap colorful ribbons around the ponytail base by threading them through the elastic band and tying a small bow or knot. Position the bow slightly off center for a more casual appearance, or keep it centered for formal events.
Thin scarves create bohemian elegance when wrapped around ponytail bases in multiple layers. Select lightweight silk or cotton scarves that won’t add bulk to your hairstyle.
Thread the scarf through your elastic band and wrap it around the base 2-3 times, depending on the scarf length. Tie a discrete knot underneath the ponytail where it won’t be visible, allowing the scarf ends to blend naturally with your hair.
Secure any loose scarf edges with small bobby pins placed strategically underneath the ponytail for a clean finish.
Low Side Ponytail
 9")
The low side ponytail offers an elegant asymmetrical approach that effortlessly elevates your everyday style. We’ll show you how to create this sophisticated look with simple techniques that add movement and texture.
Asymmetrical Styling Tips
Creating an unbalanced look starts with pulling more hair to one side than the other when securing your ponytail. We recommend sweeping all your hair to one side just above the ear for optimal placement and visual appeal.
Layered hair creates natural texture when some layers are left loose around your face for a more ever-changing appearance. We suggest gently pulling strands loose to frame your face after securing the elastic band for a softer finish.
Pinning stray hairs with bobby pins adds both security and intentional texture to your asymmetrical style. We advise using pins that match your hair color to maintain a seamless look while adding visual interest.
Sectioning your hair properly ensures the asymmetrical effect appears deliberate rather than accidental. We recommend brushing your hair thoroughly to remove tangles before creating the uneven distribution that makes this style distinctive.
Adding Gentle Waves
Curling with a large curling iron or wand creates gentle flowing waves that enhance the low side ponytail’s romantic appeal. We suggest using a barrel size of 1.5 to 2 inches for the most natural looking waves.
Sea salt spray enhances your hair’s natural texture while adding a beachy vibe to the finished style. We recommend applying the spray before curling to create lasting texture that complements the asymmetrical placement.
Finishing with a light hold hairspray maintains the waves throughout the day without creating stiffness. We advise holding the spray 8 to 10 inches away from your hair to ensure even distribution and natural movement.
Setting the style properly ensures your gentle waves remain intact from morning until evening. We suggest allowing each curled section to cool completely before moving to the next section for maximum wave retention.
Conclusion
We’ve shown you that ponytails don’t have to be boring or basic. With these versatile techniques you now have countless options to transform your everyday hairstyle into something special.
Whether you’re heading to the office or a weekend celebration these easy ponytail variations work with any hair type and skill level. From elegant low styles to playful bubble ponytails you’ve got the tools to create looks that match your mood and occasion.
The best part? Most of these styles take just minutes to master. With a few elastic bands some bobby pins and the right technique you can achieve salon-worthy results at home. Your ponytail game will never be the same!
Frequently Asked Questions
What makes ponytail hairstyles perfect for quick styling?
Ponytails are versatile, easy to execute, and require minimal time or professional skills. They work for various occasions, from office meetings to casual outings, and can be elevated with simple techniques like braiding, twisting, or adding texture. With basic tools and everyday items, you can transform a simple ponytail into a polished, sophisticated look.
How do I create a sleek low ponytail for formal events?
Start by applying heat protectant to damp hair, then blow-dry straight. Use a flat iron to smooth any remaining texture, ensuring hair lies flat against your head. Gather hair at the nape of your neck and secure with an elastic. For extra polish, wrap a small section of hair around the elastic to hide it.
What’s the best way to add volume to a high ponytail?
Use the teasing technique by backcombing a section of hair at the crown to create volume. Smooth the surface with a brush to conceal the teased area while maintaining height. Alternatively, use clip-in hair extensions for added thickness and length, blending them naturally with your existing hair for dramatic fullness.
How can I make a side-swept ponytail more flattering?
Create a dramatic deep side part using a rat tail comb, then gather hair smoothly to one side to avoid bumps. Incorporate face-framing layers to soften angular features and add movement. Wrap a small section of hair around the elastic for a polished finish, and use light hold hairspray to maintain volume.
What’s a bubble ponytail and how do I create it?
A bubble ponytail is a playful style featuring distinct “bubbles” along the length. Start with a high or mid-level ponytail, then secure clear elastic bands every 2-3 inches down the length. Gently tug at each section between bands to create volume and the signature bubble effect. Add accessories like ribbons for extra flair.
How do I maintain healthy curls in a ponytail?
Apply curl-defining products to damp hair and minimize brushing to prevent frizz. Air dry when possible and secure with silk scrunchies to reduce breakage. For enhanced texture, use a diffuser on low heat or try the “plopping” method with a microfiber towel to maintain curl definition and prevent damage.
What’s the easiest way to add sophistication to a basic ponytail?
Try hair wrapping techniques by taking a small section of your own hair and wrapping it around the elastic base, securing with bobby pins. Alternatively, wrap colorful ribbons or silk scarves around the ponytail base for added texture and visual interest, instantly elevating the overall look.
How do I create face-framing layers for ponytails?
Leave some shorter sections loose around your face when gathering hair into the ponytail. Add gentle waves with a curling iron and use sea salt spray for texture. These loose pieces soften angular features and create movement, making the style more flattering for square or angular face shapes.