We’ve all been there – staring at our reflection while running late and desperately needing a hairstyle that’s both adorable and achievable in minutes. The good news? You don’t need professional styling skills or expensive tools to create stunning looks that’ll turn heads and boost your confidence.
Whether you’re rushing to work, heading out for a casual date, or simply want to elevate your everyday style, we’ve discovered the perfect collection of cute hairstyles that anyone can master. These aren’t complicated updos that require YouTube tutorials – they’re simple, foolproof styles that work for various hair lengths and textures.
From effortless braids to chic buns and playful ponytails, we’ll show you how to transform your hair routine with techniques that take five minutes or less. Get ready to discover your new go-to looks that’ll make bad hair days a thing of the past.
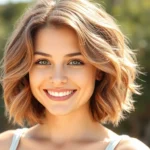
Low Ponytail With Face-Framing Pieces
This versatile hairstyle combines the elegance of a polished ponytail with the softness of strategic face framing layers. We’ll show you two stunning variations that work beautifully for both casual outings and professional settings.
Classic Side-Swept Low Pony
Creating this timeless look starts with parting your hair deeply to one side using a tail comb. Smooth the longer section across your forehead while allowing a few shorter pieces to naturally fall around your face. Gather all your hair at the nape of your neck and secure it with a clear elastic band.
Pull out thin sections of hair from around your temples and cheekbones to create those coveted face framing pieces. Gently tug at the crown area to add subtle volume and prevent the style from looking too flat against your head. Wrap a small section of hair around the elastic to hide it and secure the end with a bobby pin tucked underneath the ponytail.
Finish by lightly curling the face framing pieces away from your face using a 1 inch curling iron. This creates movement and adds romantic softness to the overall look.
Textured Low Ponytail With Loose Waves
Begin this effortlessly chic style by applying texturizing spray to damp hair before blow drying with a round brush. Create loose waves throughout your hair using a large barrel curling iron or by braiding slightly damp hair overnight for natural texture.
Gather your wavy hair into a low ponytail positioned just above the nape of your neck. Leave the ponytail slightly loose rather than pulling it super tight to maintain that relaxed, lived in appearance. Pull out face framing pieces from both sides of your head, focusing on the areas around your ears and jawline.
Scrunch the ponytail gently with your hands to enhance the textured waves and create more volume. Mist the entire style with flexible hold hairspray to keep the waves intact while allowing natural movement throughout the day.
Messy Bun Variations for Effortless Style
 1")
Messy buns offer the perfect balance of sophistication and casual charm for our busy lifestyles. These versatile styles work beautifully for both rushed mornings and planned occasions when we want that effortlessly chic look.
Top Knot Messy Bun
Creating this playful style starts with pulling our hair into a half ponytail at the crown of our head. We fan out the folded section and loop the tail back through the elastic band for added texture. The key technique involves tucking the loose edges back into the elastic to form a three-leaf clover shape that adds visual interest.
Securing the style requires pulling new sections across the front of our head in overlapping layers. We use bobby pins to anchor these pieces while maintaining the deliberately tousled appearance. Face-framing strands should be gently pulled out to soften the overall look and create that coveted casual vibe.
This top knot variation works exceptionally well because it keeps hair completely off our face while adding instant volume. The elevated placement makes it suitable for both workout sessions and dinner dates. We can easily dress it up with decorative pins or keep it simple for everyday wear.
Low Messy Bun With Hair Accessories
Starting with the basic low messy bun technique, we gather our hair at the nape and secure it with an elastic band. The trick involves pulling only a small section through on the final loop to create that perfectly imperfect texture. Any remaining loose ends get tucked into the elastic or secured with bobby pins for a polished yet relaxed finish.
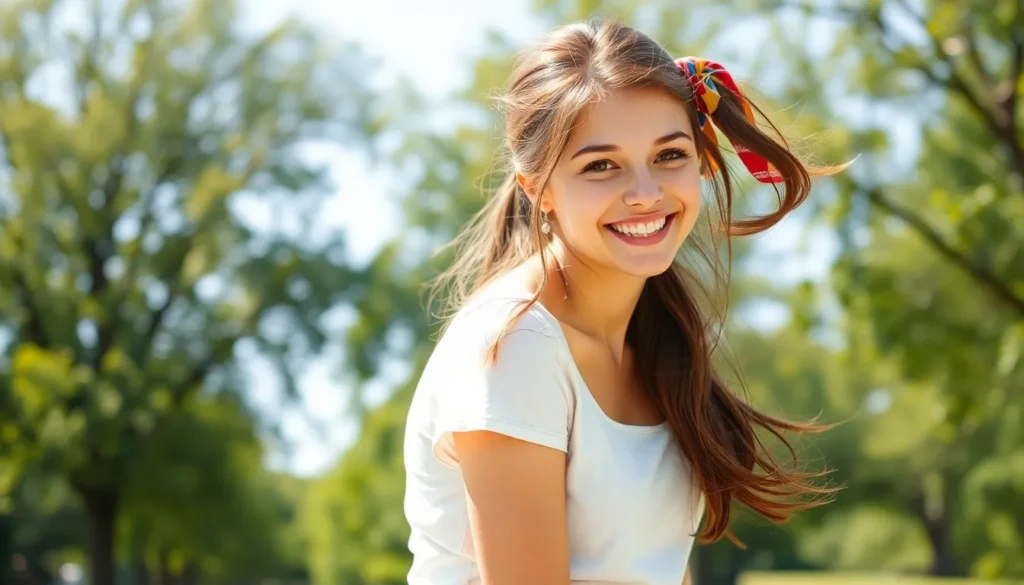
Hair accessories transform this simple style into something special for various occasions. Silk scarves wrapped around the base add elegance, while colorful scrunchies bring a playful touch. Decorative pins and headbands can be positioned strategically around the bun to match our outfit or mood.
The beauty of this accessorized version lies in its incredible versatility and personalization options. We can switch accessories throughout the week to create entirely different looks using the same basic technique. This style works particularly well for hiding second-day hair while still looking intentionally styled and put together.
Braided Hairstyles That Take Minutes
 2")
Braided styles offer endless possibilities for creating cute looks without spending hours in front of the mirror. We’ll show you two effortless braided techniques that transform your hair in under five minutes.
Simple Side Braid
Start by dividing your hair into three equal sections to create this classic braided style. Position all your hair to one side of your head for the most flattering angle. Cross the right section over the middle strand, then bring the left section over what’s now become the middle piece. Continue this alternating pattern down the entire length of your hair, maintaining even tension throughout the braiding process.
Secure the end with a clear elastic band to keep your braid intact all day. Gently tug at the outer edges of each braided section to create a fuller, more relaxed appearance. This technique works beautifully on hair that’s at least shoulder length and adds instant elegance to any outfit.
Crown Braid Headband Look
Take a small section of hair from your crown area to begin this romantic braided headband style. Divide this top section into three equal parts and start with a basic three strand braid technique. Pull each strand gently apart as you work to create a looser, more voluminous texture that mimics expensive salon work.
Curve the completed braid around your hairline like a natural headband, following the shape of your head from ear to ear. The key is positioning the braid about two inches back from your natural hairline for the most flattering frame around your face. Secure the end with bobby pins that match your hair color, tucking the tail behind your ear or pinning it discreetly at the nape of your neck.
Half-Up Half-Down Styles for Any Occasion
 3")
Half-up half-down hairstyles offer the perfect balance between keeping hair out of your face while showcasing your length and texture. These versatile styles work beautifully for weddings, proms, and everyday wear, adapting effortlessly to any occasion.
Twisted Half-Up Style
Gather two sections of hair near your temples to begin this elegant twisted look.
Form a two-strand twist with each section by wrapping the hair around itself in opposite directions.
Wrap one twisted section around the back of your head and secure it with a small elastic or bobby pin.
Repeat the same process with the opposite twisted section, creating a symmetrical crown effect.
This twisted half-up style works exceptionally well for medium to long hair lengths, though extensions can enhance the look for shorter hair. The technique adds instant sophistication to your appearance while keeping the styling process simple and quick.
Half-Up Top Knot
Section your hair by tracing from the crown to the top of your head, creating a clear division between the upper and lower portions.
Smooth back the top section and secure it with a small elastic band to form the foundation of your top knot.
Pull the ponytail partially through the elastic on the final wrap to create a looped bun effect.
Fan out the looped section to add volume and texture to your half-up top knot.
Tuck any loose ends back into the elastic for a polished finish that maintains the intentionally messy aesthetic.
This half-up top knot style can be customized with soft waves for holiday events or enhanced with braided elements for more formal occasions. The versatility of this look makes it perfect for transitioning from casual daytime activities to evening events.
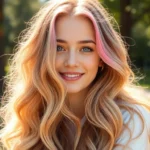
Beach Waves for Natural Texture
 4")
Beach waves create that effortlessly chic look we all crave without requiring professional styling skills. We’ll show you two foolproof methods that work with any hair length or texture.
Overnight Braid Waves
Sleeping your way to gorgeous waves is our favorite time saving technique that delivers consistent results every morning. We recommend starting with slightly damp hair for the most defined wave pattern.
Divide your hair into two or more sections depending on how tight you want the waves to appear. Braid each section loosely if you prefer softer waves or tightly for more pronounced texture. The number of braids directly affects the final outcome – two braids create loose beachy waves while four to six smaller braids produce tighter spiral patterns.
Sleep comfortably knowing your hair is working for you overnight. We suggest using a silk pillowcase to reduce friction and prevent frizz formation during the night.
Release the braids gently in the morning and avoid brushing to maintain the natural wave structure. Use your fingers to separate larger sections and create volume at the roots. Scrunch lightly with your palms to enhance the textured finish.
Sea Salt Spray Scrunched Waves
Creating beachy texture with sea salt spray gives us that fresh from the ocean look in minutes. We apply the spray to damp hair for maximum absorption and even distribution throughout each strand.
Start with towel dried hair that’s about 70% dry for optimal product penetration. Spray the sea salt solution from mid length to ends while avoiding the roots to prevent weighing down your hair. Focus on areas where you want the most texture and movement.
Scrunch your hair upward using your palms in a pulsing motion to encourage natural curl formation. We recommend scrunching in sections rather than all at once to ensure even texture distribution. Continue this process as your hair air dries naturally.
Finish with a light hold hairspray once your hair is completely dry to lock in the waves without creating stiffness. We prefer flexible hold products that allow movement while maintaining the scrunched texture throughout the day.
Space Buns for a Playful Vibe
 5")
We love how space buns instantly transform any look from ordinary to extraordinary with their youthful energy. These adorable twin buns offer endless styling possibilities that work beautifully for festivals, casual outings, or whenever you want to add some fun to your day.
High Double Buns
High double buns create the perfect playful statement by positioning two buns higher up on either side of your head. Start by parting your hair down the middle and securing each section into high ponytails above your ears. Twist each ponytail around itself and wrap it into a tight bun, securing with bobby pins or small hair elastics.
We recommend teasing the ponytails slightly before creating the buns to add extra volume and texture. Pull a few face framing pieces loose for a softer finish, or keep everything sleek for a more polished festival look. This style works exceptionally well with colorful hair accessories like glittery bobby pins or small silk scarves wrapped around the base of each bun.
Low Space Buns With Face-Framing Hair
Low space buns with face framing hair offer a more relaxed take on the classic space bun trend. Position the buns lower on your head, just behind your ears, to create a sophisticated yet playful appearance that transitions seamlessly from day to night.
Create two low ponytails and loosely twist them into buns, leaving the ends slightly messy for that effortlessly chic vibe. Pull out several strands around your face and gently curl them away from your face using your fingers or a small curling iron. These face framing pieces soften the overall look and add movement to the style.
We find this variation particularly flattering because it works with various hair textures and lengths while maintaining that cute, approachable aesthetic. Scrunch the loose pieces with a bit of texturizing spray to enhance natural waves and create dimension around your face.
Sleek Straight Hair With Middle Part
 6")
We love this timeless hairstyle because it delivers instant elegance while requiring minimal effort. This classic middle part straight style works beautifully for both casual days and formal occasions.
Pin-Straight Classic Look
Creating the pin straight classic look starts with applying heat protectant spray to damp hair. We recommend sectioning your hair into 2-inch pieces and using a high-quality flat iron with ceramic plates for even heat distribution. Start at the roots and slowly glide the iron down each section, keeping the tool moving to prevent damage.
Achieving the perfect finish requires using a paddle brush to smooth any remaining texture while the hair is still warm from styling. We suggest applying a lightweight finishing serum to add shine and eliminate frizz. This creates that signature glass-like appearance that makes the style so striking.
Professional styling tips include always working with completely dry hair before straightening and setting your flat iron to the appropriate temperature for your hair type. Fine hair works best at 300-350°F while thick or coarse hair may need temperatures up to 400°F. We find that taking smaller sections creates a sleeker result than rushing through with large pieces.
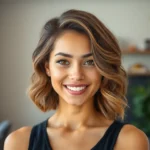
Slightly Textured Straight Style
Building texture into straight hair begins with applying a volumizing mousse to damp roots before blow drying. We create subtle movement by using a round brush while directing the hair away from the face during the drying process. This technique adds body without compromising the straight silhouette.
Adding gentle waves involves wrapping random sections around a large barrel curling iron for just 3-5 seconds. We immediately run our fingers through these pieces to soften the curl into a natural bend. This creates organic movement that looks effortless and modern.
Finishing touches require a light hold texturizing spray misted throughout the mid lengths and ends. We recommend scrunching the hair gently with your hands to encourage the texture while maintaining the overall straight shape. This approach gives you the best of both worlds with sleek roots and slightly tousled ends that move beautifully throughout the day.
Quick Twist Hairstyles
 7")
Twisting techniques offer endless possibilities for creating sophisticated looks without complex braiding skills. We’ll show you two versatile twist styles that transform your everyday hair routine into something special.
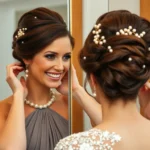
French Twist Updo
Classic French Twist creates an elegant updo perfect for formal occasions and professional settings. Gather all your hair at the nape of your neck and twist it upward away from your face. Secure the twisted section with bobby pins along the length of the twist, tucking the ends under for a polished finish. Add volume at the crown by gently teasing the hair before twisting to achieve that chic, sophisticated look.
This timeless style works beautifully on medium to long hair lengths and holds well throughout the day. We recommend using a light-hold hairspray before styling to add grip and texture to your hair.
Side Twisted Ponytail
Twisted Ponytail transforms the classic ponytail into something more playful and interesting. Start by securing your hair in a regular ponytail at your desired height. Twist the entire ponytail and secure it with a small elastic band near the ends. This simple addition creates movement and visual interest that elevates the basic ponytail style.
Side Swept Twist offers an asymmetrical approach that frames your face beautifully. Take a section of hair from your preferred side and twist it away from your face. Secure the twisted section with a small bobby pin or decorative clip behind your ear. This style works particularly well when you want to keep hair out of your face while maintaining a soft, romantic look.
Both twisted ponytail variations can be enhanced with texturizing spray for added grip and hold throughout the day.
Headband and Scarf Styling Options
 8")
Adding accessories to our hairstyles creates instant charm and transforms even the simplest looks into statement styles. These effortless accessories help us achieve polished appearances in minutes while adding personality to our everyday routines.
Bohemian Headband Look
Bohemian headband styling transforms any basic hairstyle into a festival-ready masterpiece. We recommend choosing wide headbands in vibrant colors or intricate patterns to create that signature boho vibe. Position the headband around your forehead rather than at the hairline for authentic bohemian appeal.
Creating this look requires minimal effort yet delivers maximum impact. Start with slightly tousled hair for added texture and movement. Place the wide headband approximately one inch back from your natural hairline to achieve the classic bohemian positioning.
Style versatility makes this headband technique perfect for various hair lengths and textures. Leave long hair flowing naturally over your shoulders or gather it into a loose side ponytail for casual elegance. Shorter hair benefits from gentle scrunching with texturizing spray before adding the headband accessory.
Color coordination elevates the entire bohemian headband ensemble. Choose headbands that complement your outfit palette or create striking contrast with bold metallic tones. Patterned headbands work beautifully with solid colored clothing while solid headbands pair perfectly with printed fabrics.
Silk Scarf Hair Wrap
Silk scarf wrapping adds sophisticated elegance to basic ponytails and buns instantly. We love how this styling technique works for both casual coffee dates and formal business meetings. The luxurious texture of silk creates beautiful draping while protecting hair from environmental damage.
Ponytail enhancement becomes effortless with silk scarf incorporation. Secure your hair into a low or high ponytail using a clear elastic band. Fold the silk scarf lengthwise to create a narrow band approximately two inches wide. Wrap the folded scarf around the elastic base and tie it with a small decorative knot.
Bun styling reaches new sophistication levels when paired with silk scarves. Create your preferred bun style using bobby pins for secure placement. Drape the silk scarf around the bun’s base and tie the ends in a bow or elegant knot depending on the occasion’s formality.
| Styling Method | Occasion Suitability | Completion Time |
|---|---|---|
| Bohemian Headband | Casual to Festival | Under 1 minute |
| Silk Scarf Ponytail | Casual to Business | Under 1 minute |
| Silk Scarf Bun | Business to Formal | 2-3 minutes |
Scarf selection impacts the overall aesthetic significantly. Choose lightweight silk scarves in neutral tones for professional settings or bold patterns for creative expression. Square scarves offer more styling versatility than rectangular ones due to their balanced proportions and multiple folding options.
Conclusion
We’ve shown you that achieving gorgeous hair doesn’t require hours in front of the mirror or professional styling skills. With these versatile techniques in your arsenal you’ll never have to settle for a boring hairstyle again.
The beauty of these looks lies in their adaptability – whether you’re heading to the office or a weekend brunch there’s a perfect style waiting for you. From quick twists to elegant updos each technique can be mastered with just a little practice.
Remember that confidence is your best accessory. These hairstyles are designed to make you feel effortlessly put-together so embrace the process and have fun experimenting with different looks that suit your personal style.
Frequently Asked Questions
How long do these hairstyles take to complete?
Most hairstyles featured in this article can be completed in 5 minutes or less. The quick twist styles, messy buns, and simple braids are particularly fast, while slightly more complex styles like the French twist updo or textured waves may take up to 7-10 minutes maximum.
Do I need professional tools or expensive equipment?
No, these hairstyles are designed to work with basic tools you likely already have. You’ll need items like hair ties, bobby pins, a brush, and optionally a curling iron or flat iron. Many styles can be achieved with just your hands and basic accessories.
Will these styles work on different hair lengths and textures?
Yes, the article includes options for various hair lengths and textures. Short hair can work with headband styles and half-up looks, while longer hair suits braids and buns. Many techniques can be adapted regardless of whether you have straight, wavy, or curly hair.
Can these hairstyles work for both casual and formal occasions?
Absolutely! Many styles are versatile enough for multiple settings. For example, the French twist updo and silk scarf wraps work well for formal events, while messy buns and beach waves are perfect for casual outings. The styling approach can be adjusted based on the occasion.
What products do I need to make these hairstyles last longer?
Basic products like texturizing spray, heat protectant, and sea salt spray are recommended. Volumizing mousse can add body to fine hair, while bobby pins and hair ties provide hold. Most styles don’t require expensive products – drugstore options work perfectly fine.
Are these hairstyles suitable for beginners?
Yes, all hairstyles are specifically chosen for their simplicity and ease of mastering. The article focuses on techniques that don’t require professional skills, making them perfect for beginners who want to elevate their everyday hair routine without complexity.