Hair extensions have revolutionized the way we think about styling our hair. Whether you’re looking to add length volume or experiment with colors without commitment we’ve got the perfect answers for transforming your look instantly.
We understand that choosing the right hairstyle for your extensions can feel overwhelming with countless options available. From sleek ponytails to romantic braids the possibilities are endless when you know which techniques work best with different extension types. The key lies in understanding how to blend your natural hair seamlessly with extensions while creating styles that look effortlessly beautiful.
Ready to unlock your hair’s full potential? We’re about to share the most stunning and versatile hairstyles that’ll make your extensions look like they grew from your own scalp. These expert-approved techniques will help you achieve salon-worthy results at home while keeping your extensions healthy and secure.
Choose the Right Extension Type for Your Desired Hairstyle
Selecting the perfect extension type determines the success of your desired hairstyle and ensures seamless integration with your natural hair.
Clip-in Extensions for Temporary Volume
Clip-in extensions offer the most versatile solution for quick volume and length transformations. These removable pieces snap securely into your hair using small metal clips, making them perfect for special occasions or daily styling changes. We recommend clip-ins for loose waves, bouncy curls, and voluminous ponytails since they provide instant thickness without long-term commitment.
Application takes just 5-10 minutes, and you can easily remove them before sleeping or washing your hair. Quality clip-ins blend naturally with textures ranging from straight to curly, giving you complete control over your styling routine. They work exceptionally well for adding highlights or lowlights without chemical processing.
Tape-in Extensions for Natural Blending
Tape-in extensions create the most natural-looking results through their flat, seamless attachment method. These ultra-thin wefts use medical-grade adhesive tape to bond with small sections of your natural hair, lying completely flat against your scalp. We find tape-ins ideal for sleek straight styles, soft layers, and subtle length additions that move naturally with your hair.
Professional application ensures proper placement and longevity, typically lasting 6-8 weeks before requiring repositioning. The lightweight design prevents pulling or damage to your natural hair while maintaining full styling flexibility. Tape-ins work beautifully for creating seamless color transitions and adding dimension to fine or medium-thick hair types.
Sew-in Extensions for Long-lasting Styles
Sew-in extensions provide the most durable foundation for elaborate and long-term hairstyles. This method involves braiding your natural hair into cornrows and sewing wefts directly onto the braided base using a needle and thread. We recommend sew-ins for protective styles, dramatic length changes, and textured looks that require consistent maintenance over 2-3 months.
Professional installation ensures even weight distribution and prevents scalp tension that could cause discomfort or hair loss. Sew-ins excel at supporting heavy styling like thick curls, intricate updos, and voluminous blowouts that need to withstand daily wear. They offer the strongest hold for active lifestyles and humid climates where other extension types might slip or lose their grip.
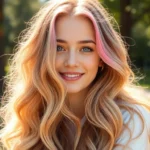
Master Beach Waves and Loose Curls with Extensions
 1")
Beach waves and loose curls transform extensions into stunning, natural-looking styles that add texture and movement to any hair length. We’ll show you professional techniques that create effortless waves and bouncy curls while ensuring your extensions blend seamlessly with your natural hair.
Creating Effortless Beach Waves
Start with texturizing spray applied to both your natural hair and extensions before styling. This product creates grip and enhances the wave formation process. We recommend misting lightly to avoid weighing down your hair.
Use a mermaid waver for the most authentic beach wave texture. The waver’s unique barrel design creates those signature ocean-inspired waves that look effortlessly tousled. Apply the waver to small sections of hair, holding for 8-10 seconds per section.
Try the overnight braiding method for a heat-free approach. Braid damp hair and extensions together before bed, then gently separate the waves in the morning. This technique works particularly well with Halo extensions since they provide extra volume and texture.
Set your waves with a light-hold texturizing spray once you’ve achieved your desired look. Scrunch the hair gently to enhance the natural wave pattern without creating stiffness.
Achieving Bouncy Spiral Curls
Select the right curling iron size based on your desired curl tightness. We recommend 1.25-inch barrels for medium bouncy curls that complement most face shapes and hair lengths.
Apply heat protectant spray generously to both natural hair and extensions before curling. This step prevents damage and helps curls last longer throughout the day.
Curl in small sections working from the bottom layers up. Take 1-inch sections and wrap them around the barrel, holding for 10-12 seconds. Release each curl into your palm and allow it to cool completely before brushing through.
Create volume at the roots by lifting each section away from your scalp while curling. This technique adds bounce and prevents flat-looking curls at the crown area.
Finish with flexible hold hairspray to maintain curl shape without stiffness. Spray from 8-10 inches away for even distribution.
Blending Natural Hair with Curled Extensions
Match curl patterns between your natural hair and extensions for seamless integration. Use your curling iron to replicate the exact curl pattern of your extensions on your natural hair, ensuring both have similar bounce and texture.
Section strategically when curling to ensure even heat distribution. Start with your natural hair, then curl extension pieces to match, paying attention to curl direction and tightness.
Test curl compatibility before styling your entire head. Take a small section of natural hair and extension hair, curl both with the same technique, and compare the results. Adjust your curling time or temperature as needed.
Blend textures by gently combing through cooled curls with your fingers or a wide-tooth comb. This step helps merge the curl patterns and creates a unified look.
Secure with light-hold products that won’t weigh down your curls or create visible residue on your extensions. We prefer lightweight mousses or curl-improving creams for this final step.
Style Sleek Straight Looks Using Hair Extensions
 2")
We’ll master the art of creating pin-straight perfection with extensions that rival any professional salon result. Extensions provide the perfect foundation for achieving sleek, polished hairstyles that turn heads.
Perfect Pin-Straight Hair Techniques
Flat ironing transforms wavy extensions into glass-like smoothness when you use proper technique and heat protection. We recommend applying heat protectant spray throughout each section before flat ironing to prevent damage and maintain the integrity of your extensions. Start with completely dry hair and work in small sections from roots to tips using smooth, steady motions.
Hair straightening brushes offer a quick alternative to traditional flat irons for achieving straight hair without excessive heat exposure. These tools combine the benefits of brushing and straightening in one step, making them perfect for touch-ups and daily styling. The brush design helps distribute heat evenly while detangling extensions simultaneously.
Temperature control prevents heat damage while ensuring optimal straightening results for your extensions. We suggest keeping flat irons between 300-350°F for synthetic extensions and up to 410°F for human hair extensions, depending on the texture and thickness of your hair.
Creating Smooth Blowout Styles
Blowout techniques using a round brush create that coveted salon-smooth finish by smoothing the cuticle layer during the drying process. We start with damp extensions and work in sections, wrapping hair around a large barrel brush while directing the blow dryer downward along the hair shaft. This method achieves maximum smoothness and reduces frizz formation.
Sectioning makes all the difference in achieving professional blowout results with extensions. We divide hair into manageable 2-inch sections, securing upper layers with clips while focusing on the bottom sections first. This systematic approach ensures every strand receives proper attention and heat exposure.
Ionic blow dryers speed up the process while reducing static and improving shine in your extensions. The negative ions break down water molecules faster, cutting drying time in half while sealing the hair cuticle for a smoother finish.
Maintaining Straight Extension Textures
Regular conditioning keeps extensions moisturized and prevents the frizz that can ruin your sleek straight style. We apply hydrating conditioner to the mid-lengths and ends of extensions weekly, avoiding the attachment points to maintain security. This practice maintains texture quality and extends the lifespan of your extensions.
Proper storage protects your investment when extensions aren’t being worn. We recommend storing them in a cool, dry place away from direct sunlight, preferably hanging or laid flat to prevent tangling and damage. Silk or satin storage bags provide additional protection against friction and moisture.
Minimal heat application preserves extension quality while maintaining your straight style longer. We limit heat styling to 2-3 times per week maximum, using the lowest effective temperature setting. Air drying between heat sessions allows extensions to recover and maintains their structural integrity.
Lightweight styling products enhance the straight style without weighing down your extensions or creating buildup. We choose silicone-based serums and anti-frizz sprays that provide slip and shine while maintaining natural movement in your hair.
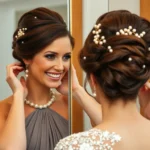
Create Voluminous Updos and Formal Hairstyles
 3")
Extensions excel at transforming simple updos into red carpet worthy formal styles. We’ll show you how to create sophisticated looks that showcase the added volume and length extensions provide.
Classic Chignon with Added Length
Classic chignons become elevated masterpieces when we incorporate hair extensions for extra length and fullness. Start by sectioning your natural hair at the crown and temporarily clip it away. Apply your extensions starting from the nape area, working upward to create a solid foundation of volume.
Gather all hair into a low ponytail at the base of your neck, securing with a clear elastic. Twist the ponytail gently while wrapping it around the base to form the classic chignon shape. Use bobby pins that match your hair color to secure the chignon, inserting them at angles for maximum hold.
Smooth any flyaways with a lightweight hair serum, focusing on the hairline and crown area. The extended length allows for more intricate wrapping and a fuller appearance that looks sophisticated for formal occasions. Leave a few face framing pieces loose and curl them lightly for a softer, more romantic finish.
Glamorous Hollywood Waves
Hollywood waves achieve their signature glamour through the added volume and length that extensions provide. Begin by applying a volumizing mousse to damp hair, then blow dry using a round brush to create lift at the roots. Section your hair horizontally, starting with the bottom layer and working your way up.
Use a 1.5 inch barrel curling iron to create deep waves, wrapping each section away from your face. Allow each curl to cool in your palm before releasing it, which helps set the wave pattern for longer lasting results. Brush through the curls gently with a wide tooth comb to soften them into flowing waves.
Apply a shine improving serum to add the glossy finish that defines classic Hollywood glamour. The extensions provide the necessary length and density to achieve those cascading waves that photograph beautifully at formal events. Finish with a light mist of flexible hold hairspray to maintain the style throughout the evening.
Braided Crown with Extension Volume
Braided crowns gain dramatic impact when extensions add the volume needed for thick, statement making braids. Start by applying texturizing spray to create grip, then section off the top portion of your hair from ear to ear. Begin a Dutch braid at one temple, incorporating small sections of hair as you work across the crown.
Continue the braid around your head like a headband, keeping the tension consistent for an even appearance. The added bulk from extensions makes the braid appear fuller and more prominent, creating a striking focal point. Secure the end with a clear elastic and tuck it behind your ear or pin it discreetly.
Curl the remaining loose hair below the braided crown using a 1 inch curling iron for romantic texture. This combination of structured braiding and flowing curls creates an elegant formal style perfect for weddings or special occasions. Finish by gently tugging at the braid edges to create a slightly messy, voluminous effect that appears effortlessly chic.
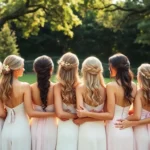
Build Beautiful Braided Styles with Extensions
 4")
Extensions transform ordinary braids into stunning, voluminous masterpieces that command attention. We’ll show you three expert-approved braided techniques that maximize your extension investment while creating looks that appear naturally full and textured.
Dutch Braid with Extension Thickness
Dutch braids create dramatic volume by weaving strands underneath instead of over, producing that coveted “inside out” effect. We recommend securing extensions close to your scalp using the candy cane technique—simply fold the top section of your extension and hook it over your natural hair for invisible attachment.
This braiding method works exceptionally well with extensions because the underneath weaving pattern naturally incorporates added thickness. Start your Dutch braid at the crown and cross each strand underneath the previous one, allowing the extensions to blend seamlessly with your natural texture.
Choose extensions that perfectly match your hair color and texture for the most authentic appearance. The Dutch braid’s raised profile showcases extension volume beautifully while maintaining security throughout wear.
Fishtail Braid Techniques
Fishtail braids offer elegant sophistication through their intricate weaving pattern that creates stunning texture and movement. Begin by dividing your hair into two equal sections, then cross small pieces from one section to the other instead of traditional three-strand braiding.
We incorporate extensions by gently weaving them into the braid as you progress down the length. This gradual integration ensures extensions stay secure while maintaining the fishtail’s signature narrow, detailed appearance.
The fishtail technique naturally accommodates extension thickness because you’re working with smaller hair sections throughout the braiding process. Pull gently at the braid’s edges after completion to create that coveted fuller, more textured finish.
Bohemian Side Braids
Bohemian side braids embody relaxed elegance with their soft, flowing appearance that’s perfect for casual styling. We start with a small section of hair at your temple and gradually incorporate extensions as we braid toward the opposite ear.
These braids work beautifully with flower accessories or delicate hair jewelry that enhances the bohemian aesthetic. Secure extensions by weaving them gently into the braid pattern and finishing with a small, clear elastic band that won’t disrupt the natural flow.
The side braid placement allows extensions to add dramatic length while maintaining the effortless, undone quality that defines bohemian styling. Use braiding gel or light hairspray to maintain the braid’s structure without sacrificing that coveted soft, romantic texture.
Design Half-Up, Half-Down Hairstyles
 5")
Half-up styles with extensions offer the perfect balance between polished and relaxed looks. These versatile designs let you showcase both volume and length while keeping hair away from your face.
Top Knot with Flowing Extensions
Creating a top knot with extensions transforms your everyday bun into a statement style that exudes effortless elegance. We pull all hair into a high bun positioned at the crown, allowing extensions to create a fuller knot and longer flowing pieces around the face. This chic technique works exceptionally well for hiding dirty hair while adding a stylish touch to any outfit.
Extensions provide the necessary volume to achieve that coveted messy-yet-polished aesthetic that celebrities love. We recommend securing the knot with bobby pins that match your hair color for seamless blending. The flowing extensions frame your face beautifully, creating movement and dimension that elevates this simple updo into red carpet territory.
Twisted Half-Up Styles
Twisted half-up styles gain incredible texture and complexity when enhanced with hand-tied extensions that blend seamlessly without visible bonds. We create these looks by sectioning the top half of hair, twisting it gently, and securing it with clear elastics or decorative clips. Extensions add the necessary thickness to make twists appear full and luxurious rather than thin or sparse.
Hand-tied extensions excel in twisted styles because they can be manipulated into various shapes without revealing attachment points. We love how these styles work for both casual daywear and evening occasions, offering versatility that adapts to your schedule. The twisted elements create visual interest while the loose bottom section maintains movement and flow.
Braided Crown with Loose Waves
Braided crown styles achieve dramatic impact when extensions thicken the braid and add substantial volume to loose waves underneath. We begin by creating a crown braid that wraps around the head, incorporating extensions gradually for consistent thickness throughout the weave. The remaining hair flows in loose waves, showcasing the added length and movement that extensions provide.
Halo extensions work particularly well for this technique, especially for those with thin hair who need extra bulk for substantial braids. We secure the crown braid with small clear elastics placed strategically to maintain the style’s integrity throughout the day. The contrast between the structured braid and flowing waves creates a romantic, bohemian aesthetic that’s perfect for weddings and special events.
Achieve Trendy Ponytail Variations
 6")
Ponytails represent one of the most versatile and instantly groundbreaking hairstyles we can create with extensions. Extensions allow us to create ponytail looks that would be impossible with natural hair alone, from sky-high styles to sleek sophisticated versions.
High Ponytail with Extra Length
Clip-in ponytail extensions transform ordinary high ponytails into dramatic statement looks. We recommend securing your natural hair into a high ponytail first, then attaching the clip-in extension directly to the base for seamless integration. Teasing the crown area before creating the ponytail adds extra height and helps conceal the attachment point.
Double pony technique works perfectly for those wearing multiple extension rows. Split the top rows of extensions into the main ponytail while leaving the bottom row loose to wrap around the elastic. This method ensures all extensions stay secure throughout the day without slipping or creating bulk at the base.
Professional styling tools make all the difference in achieving that polished finish. Use a soft bristle brush to smooth any flyaways and finish with a light mist of hairspray to lock the style in place.
Low Sleek Ponytail Styles
Sophisticated low ponytails showcase the sleek elegance that extensions can provide. Position the ponytail at the nape of your neck and use a smoothing brush to eliminate any texture or bumps from root to tip. Extensions naturally add the weight needed to achieve that coveted salon-smooth appearance.
Strategic sectioning creates the most polished results. Divide your hair into three horizontal sections, securing each layer individually before combining them into the final low ponytail. This technique ensures every strand lies perfectly flat against your head.
Hair accessories enhance the sophisticated appeal of low ponytails. Add a silk scrunchie or decorative hairband to elevate the look from casual to formal. The extra length from extensions allows these accessories to make a more dramatic impact.
Textured Messy Ponytails
Messy ponytails benefit enormously from the added volume that clip-in extensions provide. Apply texturizing spray to both your natural hair and extensions before styling to create that perfectly imperfect texture. The additional thickness from extensions makes the messy look appear more intentional and styled.
Blending techniques ensure natural movement throughout the ponytail. Curl or straighten your natural hair and extensions together using the same heat setting to match the texture perfectly. This creates a cohesive look where the extension seamlessly disappears into your natural hair.
Finishing products add the final touch to textured ponytail styles. Dry shampoo applied to the roots creates extra grip and volume, while a light texturizing spray on the ponytail itself enhances the messy, lived-in appearance that makes this style so effortlessly chic.
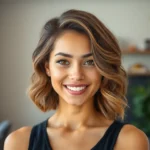
Style Short Hair with Extensions for Length
 7")
We’ll transform your short hair into stunning long styles using strategic extension placement and professional blending techniques.
Bob to Long Hair Transformation
Clip-in extensions revolutionize bob hairstyles by adding instant length for special occasions or daily wear. We recommend securing 3-4 wefts at different layers throughout your bob to create natural volume distribution. Application takes just 10 minutes, and removal protects your natural hair from daily styling damage.
Half-up, half-down styles work beautifully with bob extensions, creating elegant length while maintaining face-framing layers. We secure the top section with bobby pins and let extension-enhanced lengths flow freely for a chic, effortless appearance. This technique adds 6-8 inches of length while keeping your bob’s original shape intact.
Layered blending ensures seamless integration between your bob and extensions. We trim extension ends to match your bob’s layers, creating natural movement and preventing obvious demarcation lines. Strategic cutting makes extensions appear to grow naturally from your existing hair.
Pixie Cut Extension Blending
Fringe extensions enhance pixie cuts by adding strategic length at the front hairline. We clip these specialized pieces just above your natural fringe, creating face-framing layers that blend seamlessly with shorter hair. The technique adds instant sophistication without overwhelming your pixie’s edgy appeal.
Layered extension placement transforms pixie cuts into textured, fuller styles. We position small wefts throughout your crown area, matching your natural hair’s layers for optimal blending. This method creates volume and movement while maintaining your pixie’s structured shape.
Color matching becomes crucial for pixie cut extensions since every strand shows prominently. We recommend professional color consultation to ensure perfect matches, as even slight variations become obvious with shorter base hair. Custom coloring extensions to your exact shade prevents detection.
Adding Length to Shoulder-Length Hair
Low ponytail enhancement uses extensions to create elegant, floor-length styles from shoulder-length hair. We secure 4-5 wefts horizontally across your head before gathering into a low ponytail, adding 12-16 inches of flowing length. The technique works perfectly for formal events and everyday glamour.
Beachy wave styling combines shoulder-length hair with extensions for effortless, textured length. We apply texturizing spray to both natural hair and extensions before braiding overnight, creating uniform waves throughout. This heat-free method protects your hair while achieving Instagram-worthy beachy texture.
Blunt cut finishing creates dramatic length transformation for shoulder-length hair. We position extensions to extend your natural hairline, then trim all lengths to one level for a striking, geometric appearance. The technique adds 8-10 inches while maintaining clean, modern lines.
Conclusion
Extensions offer endless possibilities for transforming your look whether you’re working with long flowing hair or a chic pixie cut. We’ve covered everything from creating beachy waves to sophisticated updos and everything in between.
The key to successful extension styling lies in choosing the right type for your desired look and mastering the blending techniques that make them appear seamless. Remember that practice makes perfect and don’t be afraid to experiment with different styles until you find what works best for you.
With the right techniques and a little creativity you can achieve salon-quality results at home. Your extensions are an investment in versatility so take care of them properly and enjoy the confidence that comes with having gorgeous hair every day.
Frequently Asked Questions
What are the best types of hair extensions for beginners?
Clip-in extensions are ideal for beginners because they’re easy to apply and remove without professional help. They provide instant length and volume transformation, perfect for experimenting with different looks. Unlike permanent options, clip-ins don’t require long-term commitment and can be styled at home with minimal risk of damage to your natural hair.
How long do different types of hair extensions last?
Clip-in extensions can last 6-12 months with proper care since they’re removable. Tape-in extensions typically last 6-8 weeks before needing professional reapplication. Sew-in extensions are the most durable option, lasting 2-3 months or longer, making them perfect for long-term styling and protective hairstyles.
Can I use heat styling tools on hair extensions?
Yes, but always use heat protectant spray and keep temperatures below 350°F to prevent damage. Quality human hair extensions can handle styling tools like curling irons, flat irons, and blow dryers. However, limit heat exposure and use lower temperatures than you would on natural hair to maintain the extensions’ longevity and appearance.
How do I blend extensions with my natural hair seamlessly?
Match your curl pattern and hair texture as closely as possible when purchasing extensions. Use texturizing products to help blend different textures, and always curl or style your natural hair and extensions together. Test curl compatibility before styling, and use lightweight finishing products to create a cohesive, natural-looking result.
What’s the difference between synthetic and human hair extensions?
Human hair extensions can be styled with heat tools, colored, and treated like natural hair, lasting longer with proper care. Synthetic extensions are more affordable but have limited styling options and shorter lifespans. Human hair provides more versatility and natural movement, while synthetic options offer consistent texture and color that won’t fade.
How do I care for my hair extensions to make them last longer?
Store extensions properly on a hanger or in a storage box when not in use. Use sulfate-free shampoos and deep conditioning treatments regularly. Limit heat styling and always use heat protectant products. Brush gently with a wide-tooth comb, starting from the ends and working upward to prevent tangling and breakage.
Can I sleep with hair extensions in?
Avoid sleeping with clip-in extensions as this can cause tangling and damage. However, tape-in and sew-in extensions can be worn overnight since they’re semi-permanent. Always braid or loosely tie long extensions before bed and use a silk pillowcase to reduce friction and prevent matting while you sleep.
How do I choose the right color match for my extensions?
Take photos of your hair in natural lighting and compare them to extension color charts. Consider your hair’s undertones and highlights, not just the base color. When in doubt, choose a slightly lighter shade as extensions can appear darker than expected. Many brands offer color-matching services or sample swatches for testing.