Start by squeezing out moisture with a towel; don’t skip this step.
Section your hair into four to five pieces and apply heat protectant plus quick-dry product before blow-drying.
Use an ionic dryer with a concentrator nozzle, directing airflow downward while working roots first with lift-and-rotate motions.
Finish with cool air bursts to seal cuticles and reduce frizz.
The prep work alone cuts your drying time significantly.
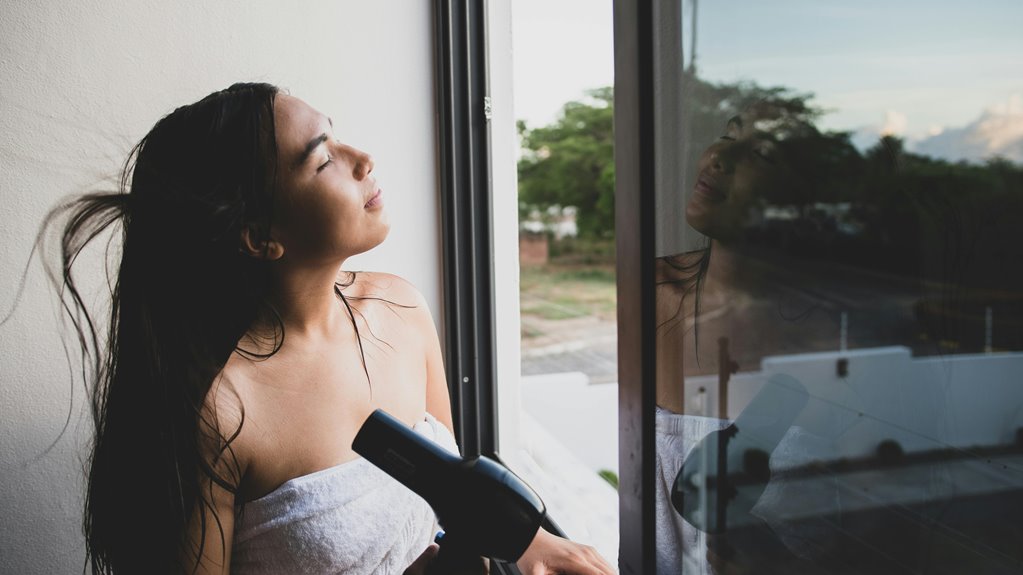
Start With a Towel Squeeze, Not a Blow Dryer

Start with a towel squeeze, not a blow dryer, to protect your strands and dramatically reduce drying time.
If you’ve ever jumped straight to your blow dryer with soaking-wet hair, you’re working against the clock. Skipping this step wastes precious minutes and damages your strands.
Instead, start with a towel squeeze. Gently compress sections of hair in your hands using a microfiber towel. This absorbs moisture without crushing cuticles. Next, section your hair into manageable parts and blot each one, focusing on mid-lengths and ends where water pools.
Here’s what makes a difference: flip your head upside down and shake gently with your fingers. This removes additional droplets and kickstarts air-drying naturally. Then grab a wide-tooth comb to promote airflow and reduce tangles.
Wait until your hair feels damp, not dripping, before blow-drying. This prep work cuts your total drying time dramatically while keeping your hair healthy and shiny.
Choose the Right Blow-Dryer for Speed

I’ll help you find a blow-dryer that actually saves you time. You’ll want ionic and ceramic technology that reduces frizz while heat and speed settings let you customize your drying approach for different hair sections. A lightweight design matters too; you’re holding this thing for ten minutes straight, so comfort and control are important for getting through your long hair quickly.
Ionic And Ceramic Technology
Want to cut your drying time in half? Ionic and ceramic technology transforms your blow-dry experience. Here’s why I recommend investing in a dryer with these features.
Ionic dryers emit negative ions that break down water molecules on your hair. This means faster drying and less frizz. Ceramic heat distributes temperature evenly, preventing hot spots that damage strands.
When you combine both technologies, you’re getting professional-grade results at home. Your hair dries smoother and shinier because the ionic technology seals your hair cuticles while ceramic heat works gently underneath.
I’ve noticed a significant difference in my drying time and final results. You’ll appreciate how these advanced dryers reduce heat damage while speeding up the process. That’s the winning combination for quick, healthy-looking blowouts.
Heat And Speed Settings
Why does your dryer’s wattage and settings matter so much for speed? The right heat settings and speed settings work together to dry your hair efficiently while minimizing damage. I recommend starting on high heat and speed to quickly remove moisture, then tapering down for final smoothing. This strategic approach keeps you on track for that 10-minute goal.
| Setting | Purpose | Hair Type | Timing |
|---|---|---|---|
| High heat/speed | Remove bulk moisture | All types | First 5 minutes |
| Medium heat/speed | Continue drying sections | All types | Next 3 minutes |
| Low heat + cool shot | Set style, reduce frizz | All types | Final 2 minutes |
Using variable settings gives you control. The cool shot feature seals your cuticles without extra heat damage, protecting your long hair while you blow dry efficiently.
Lightweight Design Matters
Your blow-dryer’s weight directly impacts how fast you can dry long hair. When you’re holding a heavy tool for ten minutes straight, arm fatigue sets in quickly. Choosing a lightweight design prevents exhaustion during longer sessions.
Look for models under two pounds. A balanced weight distribution matters equally; it keeps the dryer stable in your hand without constant readjusting. An ergonomic grip means you’ll maintain better control while working through thick sections, which actually speeds up your drying process.
The right lightweight design lets you work efficiently without fatigue. You’ll move faster, dry more thoroughly, and finish your long hair styling without that burning arm feeling. This practical investment improves your entire routine.
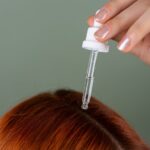
Prep With Heat Protectant and Quick-Dry Product
Before you even turn on your blow-dryer, apply a heat protectant spray like Oribe Royal Blow Out Spray to shield your hair from damage. Next, shake up a quick-dry product. These reduce drying time by up to 50% and work through evenly to protect while speeding the process. This two-step prep is what separates a rushed, frizzy blow-dry from a smooth, polished finish in under 10 minutes.
Apply Heat Protection First
The key to drying long hair in under 10 minutes is starting with heat protectant. I always apply it to my towel-dried hair before touching any heated tools. This shield guards your strands from damage while you work quickly.
Here’s my approach: After towel-drying, I spray heat protectant evenly throughout my mid-lengths and ends. Then I layer a quick-dry product on top. I also use a leave-in conditioner to add moisture during this prep stage.
This two-step combo isn’t redundant; it’s strategic. The heat protectant creates a barrier while the quick-dry product accelerates moisture evaporation. Together, they let me blow-dry faster without sacrificing hair health. You’re protecting and speeding up simultaneously, which means healthier hair in less time.
Choose Quick-Dry Products Wisely
Not all styling products work equally when you’re racing against the clock. Specific formulas actually accelerate your blow-dry routine, and I recommend these options:
- Look for “quick-dry” or “blow-dry” labeled products. These contain moisture-wicking ingredients that reduce drying time significantly.
- Pair a heat protectant with a quick-dry product. This combination shields your hair while speeding up the process.
- Apply leave-in conditioners like Kérastase Elixir Ultime. They lock in moisture without weighing hair down.
After you towel-dry, apply these products thoroughly with a brush to achieve even coverage. The heat protectant shields against damage while the quick-dry formula allows moisture to escape faster. Using both together delivers faster results without sacrificing hair health.
Section Hair Into 4–5 Manageable Pieces
Salon professionals section hair before blow-drying because it improves speed and control. Dividing your hair into four to five sections creates an even distribution strategy that improves your drying technique.
Start at the bottom layers and work upward. This approach allows each section to dry thoroughly before moving on. Use clips to keep upper sections out of the way while you focus on one area at a time.
Working with manageable pieces reduces heat exposure and minimizes tangling. Grab a paddle brush for each section and direct airflow from roots outward. You’ll notice smoother results and faster overall drying time, finishing in under ten minutes.
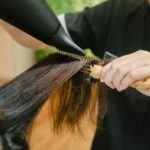
Blow-Dry Roots First Using Lift-and-Rotate Technique

Blow-Dry Roots First Using Lift-and-Rotate Technique
Since roots are the foundation of voluminous, long-lasting style, tackle them first while your hair is still damp and most receptive to shaping.
The lift-and-rotate technique maximizes root volume efficiently. Here’s the approach:
- Lift at the crown – Position your round brush directly under roots and direct airflow outward, pushing hair away from the scalp for instant lift.
- Rotate anti-clockwise – As you move through each section with your left hand, rotate the brush continuously to keep roots standing perpendicular to your scalp.
- Focus on the first 1–2 inches – Concentrate effort closest to the scalp where volume matters most, keeping downward airflow to smooth cuticles simultaneously.
Finish each section completely before moving upward. This strategic approach locks in root lift that lasts all day.
Switch to a Round Brush for Mid-Lengths and Ends

Once you’ve dried your roots, grab your round brush to tackle the rest of your hair. Use a lift-and-rotate motion along each section, keeping your dryer airflow pointed downward to smooth the cuticles and create that bounce. This technique cuts your drying time because the brush’s surface area helps evaporate moisture faster while building volume exactly where you want it.
Round Brush Technique Basics
To transform your mid-lengths and ends into a sleek, bouncy finish, swap your paddle brush for a round brush. A nylon-bristled round brush gives you smoother tension and helps define your natural texture as you blow-dry.
Here’s how to master the technique:
- Direct airflow down the hair shaft to minimize frizz and create shine
- Rotate anti-clockwise on your left side, then clockwise on the right to maintain even tension
- Apply heat-protectant first to preserve your hair’s integrity during styling
Work through small sections methodically. This consistency prevents damage and produces balanced results across your entire head. Once you’ve finished blow-drying, give your hair a cool shot to set the style and lock in the round-brush shape you’ve created.
Creating Volume and Bounce
Now that you’ve mastered the round brush basics, it’s time to employ that technique specifically for volume. I divide my hair into sections, starting from the bottom and working upward. This approach lets me focus on lifting roots where it matters most.
When I blow dry each section, I rotate my round brush while directing airflow downward. This flattens the hair cuticles and creates natural bounce. I keep the brush moving constantly to prevent heat damage and ensure even volume throughout.
My strategy involves three key steps. First, use lightweight products that won’t weigh sections down. Second, after drying each area, blast it with cool air. Third, this sets the shape and locks in the volume I’ve worked to create.
Direct Airflow Down to Speed Up Blow-Drying

Why does pointing your dryer downward make such a difference? Direct airflow along your hair shaft flattens cuticles and reduces frizz. This technique cuts your drying time significantly while keeping you in control.
Here’s how I get results:
- Position your concentrator nozzle downward as you work through sections, directing heat from roots to tips consistently.
- Use a round brush with downward strokes while keeping your blow-dryer moving to maintain tension and momentum.
- Apply your heat-control tool strategically: use high heat for speed, then finish with a cool shot to seal the cuticles.
Start with front sections first. Pull the brush downward while the airflow follows, maximizing both speed and style. This downward airflow approach turns your blow-drying routine into an efficient, professional process.
Finish Your Blow-Dry With Cool Air Bursts

After you’ve styled each section with heat, a quick cool air burst seals everything in place. Use the cool shot setting on your dryer for just a few seconds on each section. This simple step locks in your style and gives you that polished shine.
Direct the cool air downward along your strands to keep them smooth and reduce frizz as you complete each pass. Pair this cool-down with a final brush-through to unify your texture and enhance that polished look.
The benefit is twofold: you’ll seal cuticles while minimizing heat exposure to your hair. This technique extends your blow-dry’s longevity, so your style stays put longer and holds its shape throughout the day.
Lock in Your Blow-Dry Overnight: Silk Pillowcase and Spray

Your blow-dry’s polished finish doesn’t have to disappear the moment you hit the pillow.
Extending your blow-dry results overnight is totally doable with the right approach. Here’s what works:
- Invest in a silk pillowcase. It reduces friction while you sleep, keeping your hair smoother and less tangled when you wake up.
- Apply a light setting spray. This locks in your volume and shape, supporting overnight maintenance without heavy product buildup.
- Let your hair cool first. Allow five minutes after finishing before sleeping to seal the blow-dry finish.
The combination of a silk pillowcase and setting spray keeps your style fresh for in-between days. You’ll maintain that smooth, voluminous look and extend your blow-dry’s longevity, meaning you’re spending less time styling throughout the week.
Avoid These Speed Killers: Heat Damage, Frizz, and Flyaways

When you’re rushing to dry long hair in 10 minutes or less, heat damage, frizz, and flyaways can derail your whole style. Here’s how to prevent these speed killers.
First, always apply a heat protectant before blow-drying. This creates a barrier between your hair and intense heat. Next, section your hair into manageable layers, starting with the bottom sections. This technique keeps you focused and prevents overheating any single spot.
Always apply heat protectant before blow-drying and section hair into manageable layers to prevent overheating and damage.
Use a round brush to tame those pesky baby hairs and flyaways as you work. The brush keeps your strands smooth while your dryer’s cool shot seals everything down at the end.
Finally, choose an ionic dryer with variable settings. Low to medium heat works better than full blast, protecting your hair while still delivering results fast.