Start with damp, not soaking, hair for better gel grip. A medium-hold gel like L’Oréal Paris Studio Line Above it All Invisi Gel works well for fine or straight hair without crunch. Apply quarter-size dollops from roots to mid-lengths, then slick everything back using your fingers or a comb. Finish with a misting spray to lock in shine and control flyaways. This five-minute routine creates that glossy, polished look you’re after, with plenty of room to refine your technique as you practice.
Start With Damp Hair, Not Soaking Wet

Start With Damp Hair, Not Soaking Wet
When you’re aiming for that coveted wet-look hairstyle, your starting point matters more than you’d think. Damp hair, not dripping wet, is the right foundation for achieving this trend.
Here’s why: damp hair gives your gel application the proper grip. You’ll distribute products evenly from roots to mid-lengths without them slipping around. This moisture level prevents that heavy, weighed-down feeling that soaking-wet hair creates.
Start by towel-drying your hair until it’s moist but not dripping. This foundation lets you build your wet look with control. As you apply gel and styling products, you’ll notice they hold better and create that glossy finish you’re after.
Towel-dry to moist, not dripping, for better gel grip and that glossy wet-look finish you’re after.
This approach saves time and delivers consistent results every single time.
Choose a Medium-Hold Gel Based on Your Hair Type

Why does gel choice matter so much for the wet look? Your gel is the foundation of everything. The wrong product will leave you with stiff, flaky hair instead of that sleek, glossy finish you’re after.
I’d recommend starting with a medium-hold gel. It gives you enough grip to slick your hair back without making it feel heavy or crunchy. For fine or straight hair, consider a volume-boosting, crunch-free option like L’Oréal Paris Studio Line Above it All Invisi Gel. It’ll add body while keeping that shine intact.
Your hair type determines what’ll actually work. Medium-hold gels balance control with flexibility, giving you the wet look without sacrificing movement.
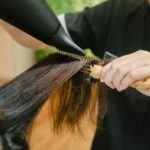
Apply Gel From Roots to Mid-Lengths

Now that you’ve picked the right gel, it’s time to apply it strategically. Start at your roots, where you’ll create that slick foundation everyone’s after. Work the gel downward toward your mid-lengths using quarter-size dollops. This approach provides uniform texture and locks in that authentic wet look.
Apply to damp hair, not soaking-wet strands. Damp hair grips the gel better, distributing it evenly without clumping. When you’re working the product through, massage it in gently. You’re building texture, not weighing your hair down.
Focus on roots to mid-lengths coverage. This strategic placement maximizes hold where you need it most. Skip the ends for now; you’ll address those next. This targeted method gives you professional results in minutes.
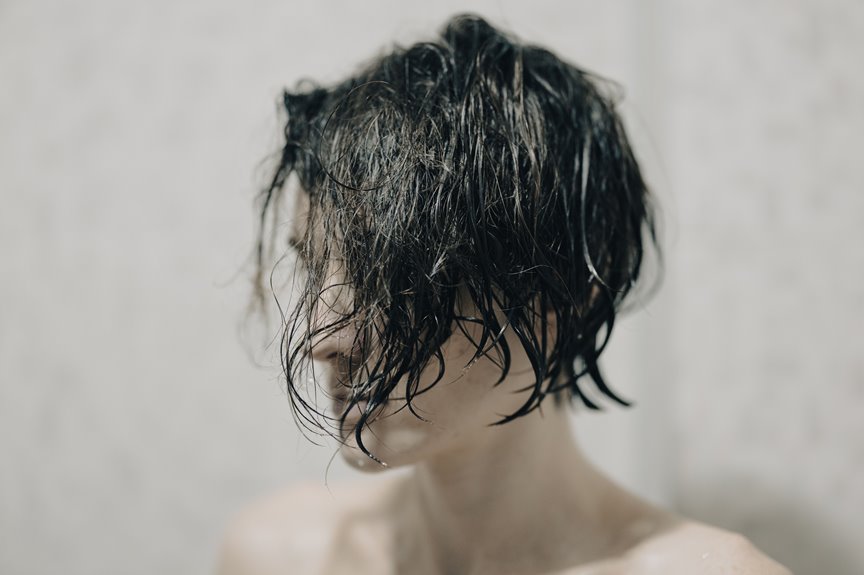
Slick Back to Create the Wet-Look Effect

The technique works by pushing your styled hair backward and smoothing it into place. This approach takes your gel styling into that coveted wet look you’re seeking. Work the product through your hair with intention, building sleekness from root to tip.
Here’s how to nail the slick-back effect:
- Push hair back from your forehead using your fingers or a comb
- Smooth sections downward to eliminate bumps and flyaways
- Apply gentle pressure to lock the gel styling in position
- Work through any resistance with patience for polished results
The key involves using enough product grip without excess. When you slick back your hair properly, the wet look holds throughout your day. You’ll notice how this simple motion unifies everything you’ve applied, creating that glossy, intentional appearance.
Set With Finishing Mist and Reapply as Needed

Once you’ve slicked your hair back and locked everything into place with gel, a finishing mist becomes your tool for sealing the wet look. I spray this mist from root to tip, which locks in that glossy shine you worked hard to create. The mist controls flyaways and baby hairs without adding weight.
| When to Reapply | Why It Works | Best Conditions |
|---|---|---|
| Mid-day touch-ups | Refreshes gloss and control | After humidity exposure |
| Before important events | Maintains sleek appearance | In windy environments |
| As needed throughout day | Prevents product buildup | Between wash days |
I reapply as needed to maintain that coveted gloss. You’ll notice humidity won’t sabotage your style when you’re consistent with this step. Keep your finishing mist handy. It’s your top tool for holding the look in place throughout the day.